
Welcome to the dangerous and challenging world of bomb defusing.
Study this manual carefully; you are the expert
. In these pages you will find everything you need to know to defuse even the most insidious of bombs.
And remember —One small oversight and it could all be over!
A bomb will explode when its countdown timer reaches 0:00 or when too many strikes have been recorded. The only way to defuse a bomb is to disarm all of its modules before its countdown timer expires.
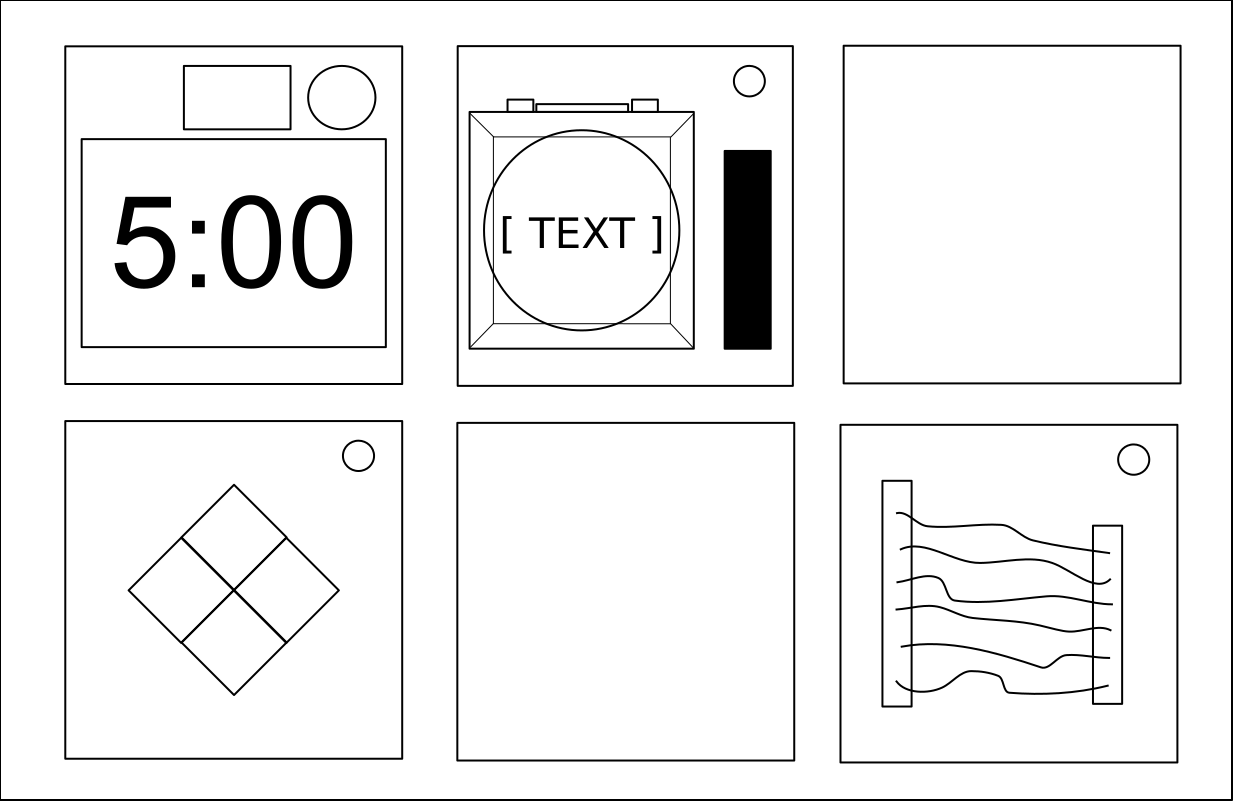
Front |
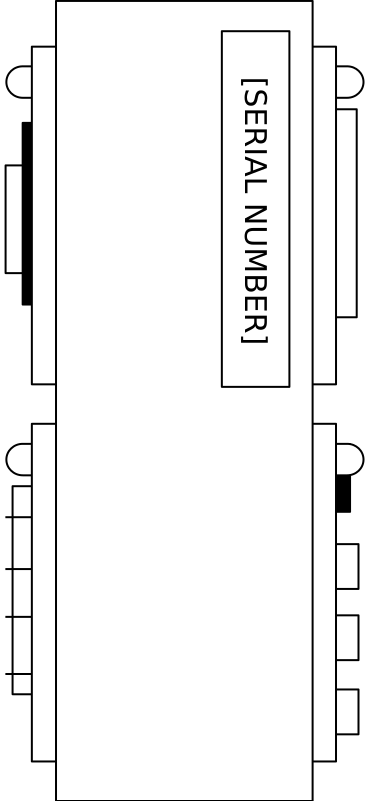
Side |
Each bomb will include up to 11 modules that must be disarmed. Each module is discrete and can be disarmed in any order.
Instructions for disarming modules can be found in Section 1. "Needy" modules present a special case and are described in Section 2.
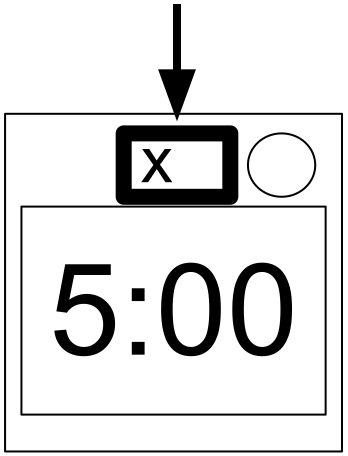
When the Defuser makes a mistake, the bomb will record a strike which will be displayed on the indicator above the countdown timer. Bombs with a strike indicator will explode upon the third strike. The timer will begin to count down faster after a strike has been recorded.
If no strike indicator is present above the countdown timer, the bomb will explode upon the first strike, leaving no room for error.
Some disarming instructions will require specific information about the bomb, such as the serial number. This type of information can typically be found on the top, bottom, or sides of the bomb casing. See Appendix A, B, and C for identification instructions that will be useful in disarming certain modules.
Modules can be identified by an LED in the top right corner. When this LED is lit green, the module has been disarmed.
All modules must be disarmed to defuse the bomb.
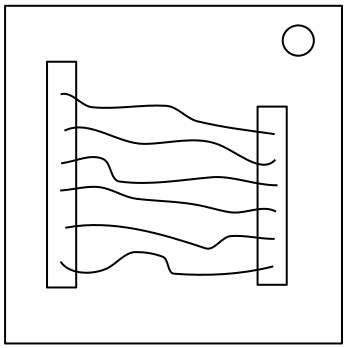
Wires are the lifeblood of electronics! Wait, no, electricity is the lifeblood. Wires are more like the arteries. The veins? No matter …
|
3 wires:
If there are no red wires, cut the second wire. Otherwise, if the last wire is white, cut the last wire. Otherwise, if there is more than one blue wire, cut the last blue wire. Otherwise, cut the last wire. |
|
4 wires:
If there is more than one red wire and the last digit of the serial number is odd, cut the last red wire. Otherwise, if the last wire is yellow and there are no red wires, cut the first wire. Otherwise, if there is exactly one blue wire, cut the first wire. Otherwise, if there is more than one yellow wire, cut the last wire. Otherwise, cut the second wire. |
|
5 wires:
If the last wire is black and the last digit of the serial number is odd, cut the fourth wire. Otherwise, if there is exactly one red wire and there is more than one yellow wire, cut the first wire. Otherwise, if there are no black wires, cut the second wire. Otherwise, cut the first wire. |
|
6 wires:
If there are no yellow wires and the last digit of the serial number is odd, cut the third wire. Otherwise, if there is exactly one yellow wire and there is more than one white wire, cut the fourth wire. Otherwise, if there are no red wires, cut the last wire. Otherwise, cut the fourth wire. |
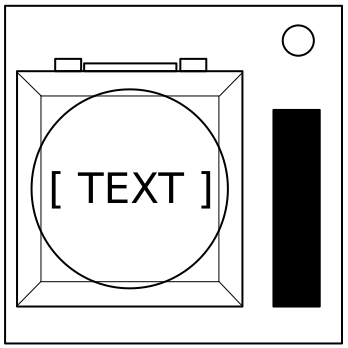
You might think that a button telling you to press it is pretty straightforward. That ’s the kind of thinking that gets people exploded.
See Appendix A for indicator identification reference.
See Appendix B for battery identification reference.
Follow these rules in the order they are listed. Perform the first action that applies:
If you start holding the button down, a colored strip will light up on the right side of the module. Based on its color, you must release the button at a specific point in time:
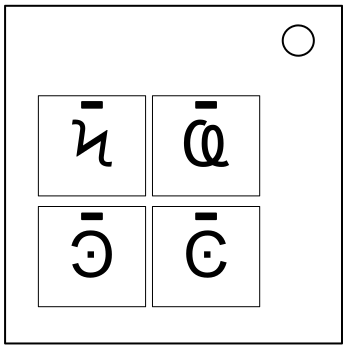
I'm not sure what these symbols are, but I suspect they have something to do with occult.

|

|

|

|

|
|
|||||

|
|

|

|

|
|
|||||

|

|

|

|
|

|
|||||

|
|

|

|

|

|
|||||
|
|

|

|
|
|
|
|||||

|
|
|

|

|

|
|||||
|
|
|
|
|

|

|
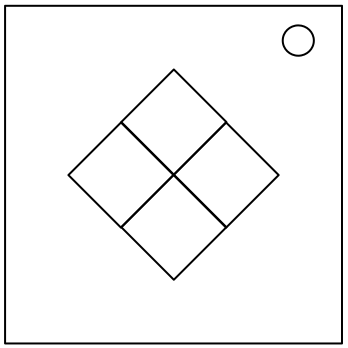
This is like one of those toys you played with as a kid where you have to match the pattern that appears, except this one is a knockoff that was probably purchased at a dollar store.
If the serial number contains a vowel:
| Red Flash | Blue Flash | Green Flash | Yellow Flash | ||
|---|---|---|---|---|---|
| Button to press: | No Strikes | Blue | Red | Yellow | Green |
| 1 Strike | Yellow | Green | Blue | Red | |
| 2 Strikes | Green | Red | Yellow | Blue | |
If the serial number does not contain a vowel:
| Red Flash | Blue Flash | Green Flash | Yellow Flash | ||
|---|---|---|---|---|---|
| Button to press: | No Strikes | Blue | Yellow | Green | Red |
| 1 Strike | Red | Blue | Yellow | Green | |
| 2 Strikes | Yellow | Green | Blue | Red | |
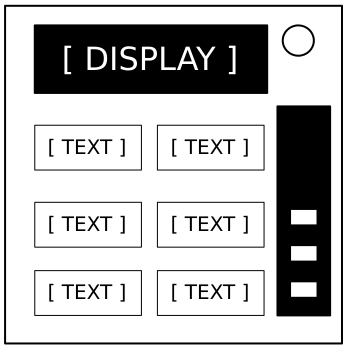
This contraption is like something out of a sketch comedy routine, which might be funny if it wasn't connected to a bomb. I ’ll keep this brief, as words only complicate matters.
Based on the display, read the label of a particular button and proceed to step 2:
|
|
|
|
|
|
||||||||||||||||||||||||||||||||||||||||||||||||
|
|
|
|
|
|
||||||||||||||||||||||||||||||||||||||||||||||||
|
|
|
|
|
|
||||||||||||||||||||||||||||||||||||||||||||||||
|
|
|
|
|
|
||||||||||||||||||||||||||||||||||||||||||||||||
|
|
|
|
||||||||||||||||||||||||||||||||||||||||||||||||||
Using the label from step 1, push the first button that appears in its corresponding list:
READY: |
YES, OKAY, WHAT, MIDDLE, LEFT, PRESS, RIGHT, BLANK, READY, NO, FIRST, UHHH, NOTHING, WAIT |
|---|---|
FIRST: |
LEFT, OKAY, YES, MIDDLE, NO, RIGHT, NOTHING, UHHH, WAIT, READY, BLANK, WHAT, PRESS, FIRST |
NO: |
BLANK, UHHH, WAIT, FIRST, WHAT, READY, RIGHT, YES, NOTHING, LEFT, PRESS, OKAY, NO, MIDDLE |
BLANK: |
WAIT, RIGHT, OKAY, MIDDLE, BLANK, PRESS, READY, NOTHING, NO, WHAT, LEFT, UHHH, YES, FIRST |
NOTHING: |
UHHH, RIGHT, OKAY, MIDDLE, YES, BLANK, NO, PRESS, LEFT, WHAT, WAIT, FIRST, NOTHING, READY |
YES: |
OKAY, RIGHT, UHHH, MIDDLE, FIRST, WHAT, PRESS, READY, NOTHING, YES, LEFT, BLANK, NO, WAIT |
WHAT: |
UHHH, WHAT, LEFT, NOTHING, READY, BLANK, MIDDLE, NO, OKAY, FIRST, WAIT, YES, PRESS, RIGHT |
UHHH: |
READY, NOTHING, LEFT, WHAT, OKAY, YES, RIGHT, NO, PRESS, BLANK, UHHH, MIDDLE, WAIT, FIRST |
LEFT: |
RIGHT, LEFT, FIRST, NO, MIDDLE, YES, BLANK, WHAT, UHHH, WAIT, PRESS, READY, OKAY, NOTHING |
RIGHT: |
YES, NOTHING, READY, PRESS, NO, WAIT, WHAT, RIGHT, MIDDLE, LEFT, UHHH, BLANK, OKAY, FIRST |
MIDDLE: |
BLANK, READY, OKAY, WHAT, NOTHING, PRESS, NO, WAIT, LEFT, MIDDLE, RIGHT, FIRST, UHHH, YES |
OKAY: |
MIDDLE, NO, FIRST, YES, UHHH, NOTHING, WAIT, OKAY, LEFT, READY, BLANK, PRESS, WHAT, RIGHT |
WAIT: |
UHHH, NO, BLANK, OKAY, YES, LEFT, FIRST, PRESS, WHAT, WAIT, NOTHING, READY, RIGHT, MIDDLE |
PRESS: |
RIGHT, MIDDLE, YES, READY, PRESS, OKAY, NOTHING, UHHH, BLANK, LEFT, FIRST, WHAT, NO, WAIT |
YOU: |
SURE, YOU ARE, YOUR, YOU'RE, NEXT, UH HUH, UR, HOLD, WHAT?, YOU, UH UH, LIKE, DONE, U |
YOU ARE: |
YOUR, NEXT, LIKE, UH HUH, WHAT?, DONE, UH UH, HOLD, YOU, U, YOU'RE, SURE, UR, YOU ARE |
YOUR: |
UH UH, YOU ARE, UH HUH, YOUR, NEXT, UR, SURE, U, YOU'RE, YOU, WHAT?, HOLD, LIKE, DONE |
YOU'RE: |
YOU, YOU'RE, UR, NEXT, UH UH, YOU ARE, U, YOUR, WHAT?, UH HUH, SURE, DONE, LIKE, HOLD |
UR: |
DONE, U, UR, UH HUH, WHAT?, SURE, YOUR, HOLD, YOU'RE, LIKE, NEXT, UH UH, YOU ARE, YOU |
U: |
UH HUH, SURE, NEXT, WHAT?, YOU'RE, UR, UH UH, DONE, U, YOU, LIKE, HOLD, YOU ARE, YOUR |
UH HUH: |
UH HUH, YOUR, YOU ARE, YOU, DONE, HOLD, UH UH, NEXT, SURE, LIKE, YOU'RE, UR, U, WHAT? |
UH UH: |
UR, U, YOU ARE, YOU'RE, NEXT, UH UH, DONE, YOU, UH HUH, LIKE, YOUR, SURE, HOLD, WHAT? |
WHAT?: |
YOU, HOLD, YOU'RE, YOUR, U, DONE, UH UH, LIKE, YOU ARE, UH HUH, UR, NEXT, WHAT?, SURE |
DONE: |
SURE, UH HUH, NEXT, WHAT?, YOUR, UR, YOU'RE, HOLD, LIKE, YOU, U, YOU ARE, UH UH, DONE |
NEXT: |
WHAT?, UH HUH, UH UH, YOUR, HOLD, SURE, NEXT, LIKE, DONE, YOU ARE, UR, YOU'RE, U, YOU |
HOLD: |
YOU ARE, U, DONE, UH UH, YOU, UR, SURE, WHAT?, YOU'RE, NEXT, HOLD, UH HUH, YOUR, LIKE |
SURE: |
YOU ARE, DONE, LIKE, YOU'RE, YOU, HOLD, UH HUH, UR, SURE, U, WHAT?, NEXT, YOUR, UH UH |
LIKE: |
YOU'RE, NEXT, U, UR, HOLD, DONE, UH UH, WHAT?, UH HUH, YOU, LIKE, SURE, YOU ARE, YOUR |
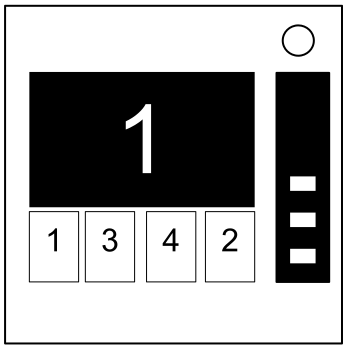
Memory is a fragile thing but so is everything else when a bomb goes off, so pay attention!
If the display is 1, press the button in the second position.
If the display is 2, press the button in the second position.
If the display is 3, press the button in the third position.
If the display is 4, press the button in the fourth position.
If the display is 1, press the button labeled "4".
If the display is 2, press the button in the same position as you pressed in stage 1.
If the display is 3, press the button in the first position.
If the display is 4, press the button in the same position as you pressed in stage 1.
If the display is 1, press the button with the same label you pressed in stage 2.
If the display is 2, press the button with the same label you pressed in stage 1.
If the display is 3, press the button in the third position.
If the display is 4, press the button labeled "4".
If the display is 1, press the button in the same position as you pressed in stage 1.
If the display is 2, press the button in the first position.
If the display is 3, press the button in the same position as you pressed in stage 2.
If the display is 4, press the button in the same position as you pressed in stage 2.
If the display is 1, press the button with the same label you pressed in stage 1.
If the display is 2, press the button with the same label you pressed in stage 2.
If the display is 3, press the button with the same label you pressed in stage 4.
If the display is 4, press the button with the same label you pressed in stage 3.
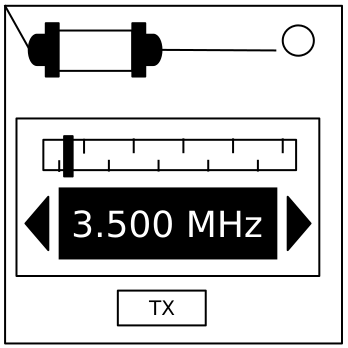
An antiquated form of naval communication? What next? At least it's genuine Morse Code, so pay attention and you might just learn something.
| How to Interpret |
|---|
|
1. A short flash represents a dot. 2. A long flash represents a dash. 3. There is a long gap between letters. 4. There is a very long gap before the word repeats. |
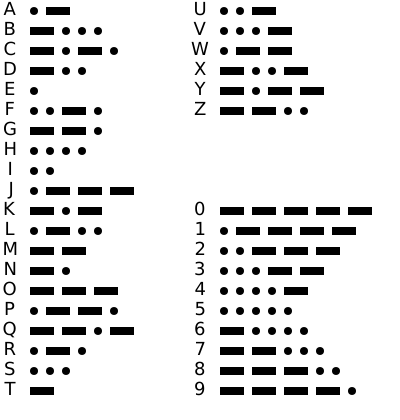
|
| If the word is: | Respond at frequency: |
|---|---|
| shell | 3.505 MHz |
| halls | 3.515 MHz |
| slick | 3.522 MHz |
| trick | 3.532 MHz |
| boxes | 3.535 MHz |
| leaks | 3.542 MHz |
| strobe | 3.545 MHz |
| bistro | 3.552 MHz |
| flick | 3.555 MHz |
| bombs | 3.565 MHz |
| break | 3.572 MHz |
| brick | 3.575 MHz |
| steak | 3.582 MHz |
| sting | 3.592 MHz |
| vector | 3.595 MHz |
| beats | 3.600 MHz |
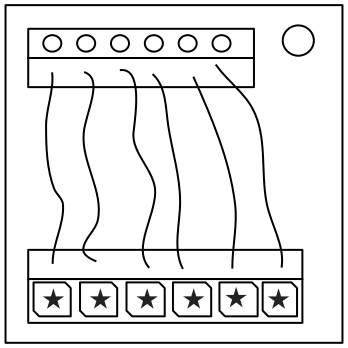
These wires aren't like the others. Some have stripes! That makes them completely different. The good news is that we've found a concise set of instructions on what to do about it! Maybe too concise...

|
Wire has red coloring |

|
Wire has blue coloring |

|
Has ★symbol |

|
LED is on |
| Letter | Instruction |
|---|---|
| C | Cut the wire |
| D | Do not cut the wire |
| S | Cut the wire if the last digit of the serial number is even |
| P | Cut the wire if the bomb has a parallel port |
| B | Cut the wire if the bomb has two or more batteries |
See Appendix B for battery identification reference.
See Appendix C for port identification reference.
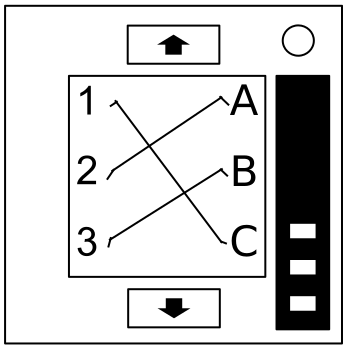
It's hard to say how this mechanism works. The engineering is pretty impressive, but there must have been an easier way to manage nine wires.
| Red Wire Occurrences | |
|---|---|
| Wire Occurrence | Cut if connected to: |
| First red occurrence | C |
| Second red occurrence | B |
| Third red occurrence | A |
| Fourth red occurrence | A or C |
| Fifth red occurrence | B |
| Sixth red occurrence | A or C |
| Seventh red occurrence | A, B or C |
| Eighth red occurrence | A or B |
| Ninth red occurrence | B |
| Blue Wire Occurrences | |
|---|---|
| Wire Occurrence | Cut if connected to: |
| First blue occurrence | B |
| Second blue occurrence | A or C |
| Third blue occurrence | B |
| Fourth blue occurrence | A |
| Fifth blue occurrence | B |
| Sixth blue occurrence | B or C |
| Seventh blue occurrence | C |
| Eighth blue occurrence | A or C |
| Ninth blue occurrence | A |
| Black Wire Occurrences | |
|---|---|
| Wire Occurrence | Cut if connected to: |
| First black occurrence | A, B or C |
| Second black occurrence | A or C |
| Third black occurrence | B |
| Fourth black occurrence | A or C |
| Fifth black occurrence | B |
| Sixth black occurrence | B or C |
| Seventh black occurrence | A or B |
| Eighth black occurrence | C |
| Ninth black occurrence | C |
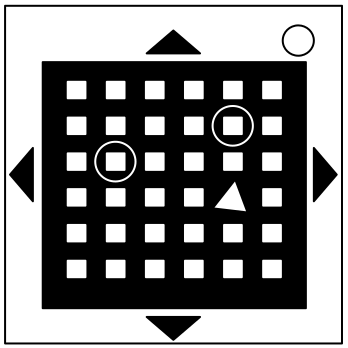
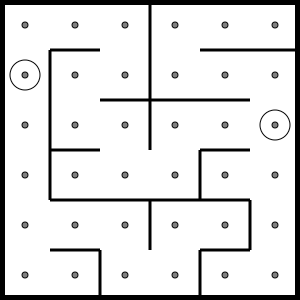
This seems to be some kind of maze, probably stolen off of a restaurant placemat.
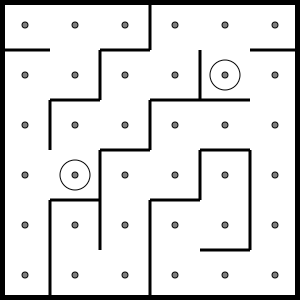
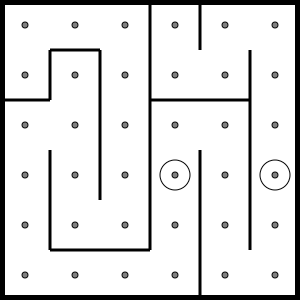
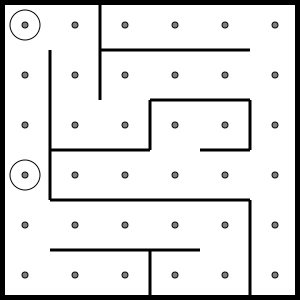
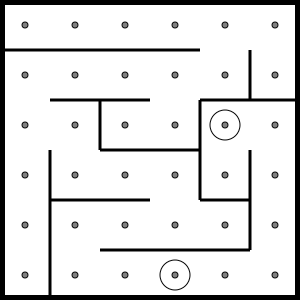
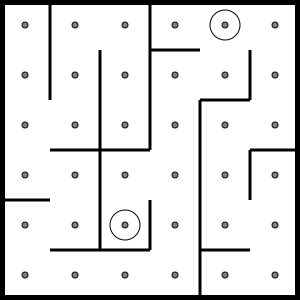
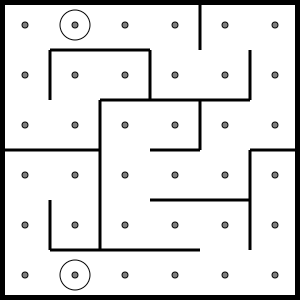
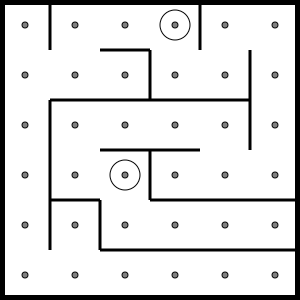
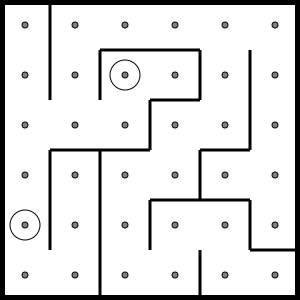
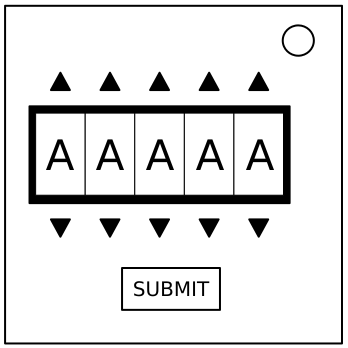
Fortunately this password doesn't seem to meet standard government security requirements: 22 characters, mixed case, numbers in random order without any palindromes above length 3.
| about | after | again | below | could |
| every | first | found | great | house |
| large | learn | never | other | place |
| plant | point | right | small | sound |
| spell | still | study | their | there |
| these | thing | think | three | water |
| where | which | world | would | write |
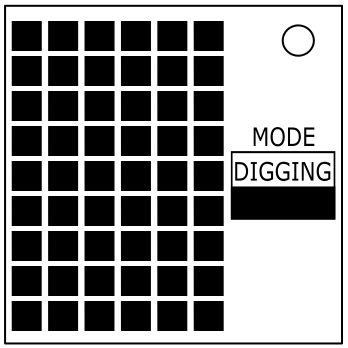
Somehow Minesweeper on a bomb feels oddly redundant.
| Color | # | |
|---|---|---|
| Red | 5 | |
| Orange | 2 | |
| Yellow | 3 | |
| Green | 1 | |
| Blue | 6 | |
| Purple | 4 | |
The first cell to dig will be one of the colored squares. Start with the second digit in the serial number. If it is zero, substitute 10. Count that many colored squares in reading order, wrapping around to the top left of the grid if necessary.
Use the color found to look up a value in the table. Add this number to the numeric value of the first letter in the serial number, with A = 1, B = 2, etc. Starting from the bottom right corner, count that many colored squares in reverse reading order, looping back if necessary. This gives you the first location to dig.
NOTE: You cannot dig other cells until you have dug the correct starting cell and digging an incorrect starting cell will give you a strike, regardless of whether it’s a mine or not.
Each number on the grid represents how many mines there are in the surrounding 8 cells. Use these numbers to figure out where each mine is. Once you have achieved either all non-mine cells dug or all mine filled cells flagged, the module will solve. Digging up a cell with a mine under it will expose the mine and a strike will be given.
NOTE: Clicking on a number while digging will dig all cells around it that aren’t flagged. Holding down on a cell will flag it instead of digging it.
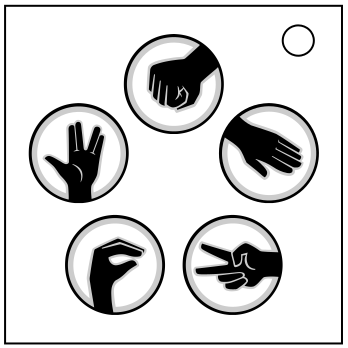
Anecdotal evidence suggests that in the game of Rock-Paper-Scissors, players familiar with each other will tie 75 to 80% of the time due to the limited number of outcomes. Rock-Paper-Scissors-Lizard-Spock was created by Internet pioneer Sam Kass as an improvement on the classic game. All hail Sam Kass. Hail.
To disarm this module, determine the correct signs to press.
First, determine the decoy. If the five signs are arranged in a regular pentagon, there is no decoy. Otherwise, the decoy is the one that is in the middle of the arrangement or in the middle in a line of three (horizontal, diagonal or vertical).
Next, go through the rows of the following table and determine the highest-scoring sign in each row. A sign scores one point per occurrence of the specified edgework item. Stop at the first row in which there’s no tie and the highest-scoring sign is not the decoy. Then press the signs on the module that beat this sign. If no row applies, press all signs except the decoy.
Which sign beats which? It’s very simple. Scissors cuts paper. Paper covers rock. Rock crushes lizard. Lizard poisons Spock. Spock smashes scissors. Scissors decapitates lizard. Lizard eats paper. Paper disproves Spock. Spock vaporizes rock. And, as it always has, rock crushes scissors.
| # of occurrences of: | Rock | Paper | Scissors | Lizard | Spock |
|---|---|---|---|---|---|
|
serial number letter
Skip this row if the serial number contains X or Y.
|
R, O | P, A | S, I | L, Z | C, K |
|
port
Skip this row if a PS/2 port is present.
|
RJ-45 | Parallel | Serial | DVI-D | Stereo RCA |
|
lit indicator
Skip this row if a lit TRN indicator is present.
|
FRK, FRQ | BOB, IND | CAR, SIG | CLR, NSA | SND, MSA |
|
unlit indicator
Skip this row if an unlit TRN indicator is present.
|
FRK, FRQ | BOB, IND | CAR, SIG | CLR, NSA | SND, MSA |
| serial number digit | 0, 5 | 3, 6 | 1, 9 | 2, 8 | 4, 7 |
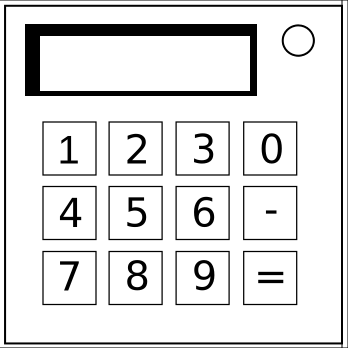
Math is easy. But is it easy when the numbers are in another language? Let's find out.
Decipher the characters on the display into numbers and solve the answer to the question. Enter the answer with the keypad and press '=' to submit it. Use '-' to toggle the negative sign for negative answers. There's no delete button so press those buttons carefully!
For example: =(+=( translates to 1+1
The answer to enter is 2.
| Character | Number |
|---|---|
| :) | 0 |
| =( | 1 |
| (: | 2 |
| )= | 3 |
| :( | 4 |
| ): | 5 |
| =) | 6 |
| (= | 7 |
| :| | 8 |
| |: | 9 |
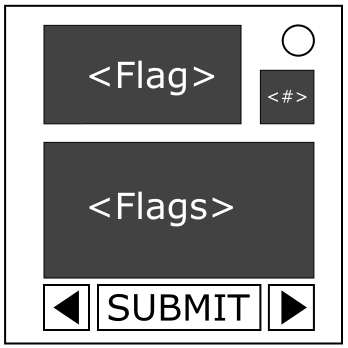
I hope you’re good at geography as this is a flag quiz that doesn’t make any sense!
The module consists of a screen with a main flag, a screen with 7 flags that can be navigated using the left and right buttons, and a screen displaying a number between 1 and 7.
Submitting a wrong flag will incur a strike. Submitting the correct flag will disarm the module.
First, sort the 7 flags by applying the first rule that follows its condition:
If there are any flags that have the same information, sort the flags with duplicate information by their country name in alphabetical order.
A number will be displayed at the top right. After sorting the flags, submit the flag in the position of the displayed number in your sorted list of flags.
BUT if there is an unlit BOB indicator, and the serial number contains any character from the phrase “WHITE FLAG” while France is in the 7 flags, ignore all above instructions and simply submit the flag of France.
Use the table in the next pages to get information about flags and countries.
| Flag | Country | Continent | Capital | Currency | ISO Code | Dial Code |
|---|---|---|---|---|---|---|
 |
Algeria | North Africa | Algiers | DZD | DZA | +213 |
 |
Australia | Oceania | Canberra | AUD | AUS | +61 |
 |
Austria | Europe | Vienna | EUR | AUT | +43 |
 |
Belgium | Europe | Brussels | EUR | BEL | +32 |
 |
Brazil | South America | Brasília | BRL | BRA | +55 |
 |
Canada | North America | Ottawa | CAD | CAN | +1 |
 |
Chile | South America | Santiago | CLP | CHL | +56 |
 |
China | East Asia | Beijing | CNY | CHN | +86 |
 |
Colombia | South America | Bogotá | COP | COL | +57 |
 |
Cuba | North America | Havana | CUP | CUB | +53 |
 |
Czech Republic | Europe | Prague | CZK | CZE | +420 |
 |
Denmark | Europe | Copenhagen | DKK | DNK | +45 |
 |
Finland | Europe | Helsinki | EUR | FIN | +358 |
 |
France | Europe | Paris | EUR | FRA | +33 |
 |
Germany | Europe | Berlin | EUR | DEU | +49 |
 |
Greenland | North America | Nuuk | DKK | GRL | +299 |
 |
Iceland | Europe | Reykjavík | ISK | ISL | +354 |
 |
India | South Asia | New Delhi | INR | IND | +91 |
| Flag | Country | Continent | Capital | Currency | ISO Code | Dial Code |
|---|---|---|---|---|---|---|
 |
Japan | East Asia | Tokyo | JPY | JPN | +81 |
 |
Mexico | North America | Mexico City | MXN | MEX | +52 |
 |
Morocco | North Africa | Rabat | MAD | MAR | +212 |
 |
Netherlands | Europe | Amsterdam | EUR | NLD | +31 |
 |
New Zealand | Oceania | Wellington | NZD | NZL | +64 |
 |
Norway | Europe | Oslo | NOK | NOR | +47 |
 |
Panama | Central America | Panama City | PAB | PAN | +507 |
 |
Peru | South America | Lima | PEN | PER | +51 |
 |
Poland | Europe | Warsaw | PLN | POL | +48 |
 |
Samoa | Oceania | Apia | WST | WSM | +685 |
 |
Senegal | West Africa | Dakar | XOF | SEN | +221 |
 |
South Korea | East Asia | Seoul | KRW | KOR | +82 |
 |
Spain | Europe | Madrid | EUR | ESP | +34 |
 |
Sudan | North Africa | Khartoum | SDG | SDN | +249 |
 |
Sweden | Europe | Stockholm | SEK | SWE | +46 |
 |
Thailand | Southeast Asia | Bangkok | THB | THA | +66 |
 |
United Kingdom | Europe | London | GBP | GBR | +44 |
 |
United States | North America | Washington, D.C. | USD | USA | +1 |
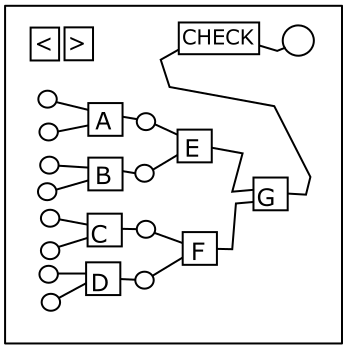
There are only 10 types of bomb experts: those who understand logic gates, and those who don’t.
The module contains a circuit of 7 logic gates, lettered A through G. Logic gates are explained on the second page. The circuit has 8 inputs and 1 output. Determine all gate types and find an input configuration that will set the final output to on.
| AND +1 |
→ | OR +2 |
→ | XOR +3 |
| ↑ | ↓ | |||
| XNOR +6 |
← | NOR +5 |
← | NAND +4 |
A logic gate is an elementary building block of a digital circuit. Most logic gates have two inputs and one output. At any given moment, every input and every output is either off (0, false) or on (1, true).
There are seven basic logic gates: NOT, AND, OR, XOR, NAND, NOR and XNOR. The NOT gate has one input and one output. The others have two inputs and one output. Inputs are normally drawn on the left, outputs on the right.
| NOT | Has only one input. True becomes false, false becomes true. This gate will not be used on the module directly. |
| AND | When both inputs are true, the output is true. Otherwise, the output is false. |
| OR | When either or both inputs are true, the output is true. When both inputs are false, the output is false. |
| XOR | (Exclusive-OR) If either, but not both, inputs are true, the output is true. If neither or both inputs are true, the output is false. |
| NAND | It operates as an AND gate followed by a NOT gate. When both inputs are true, the output is false. Otherwise, the output is true. |
| NOR | It operates as an OR gate followed by a NOT gate. When either or both inputs are true, the output is false. When both inputs are false, the output is true. |
| XNOR | (Exclusive-NOR) It operates as an XOR gate followed by a NOT gate. If either, but not both, inputs are true, the output is false. If neither or both inputs are true, the output is true. |
| INPUT | OUTPUT | ||||||
|---|---|---|---|---|---|---|---|
| AND | OR | XOR | NAND | NOR | XNOR | ||
| 0 | 0 | 0 | 0 | 0 | 1 | 1 | 1 |
| 0 | 1 | 0 | 1 | 1 | 1 | 0 | 0 |
| 1 | 0 | 0 | 1 | 1 | 1 | 0 | 0 |
| 1 | 1 | 1 | 1 | 0 | 0 | 0 | 1 |
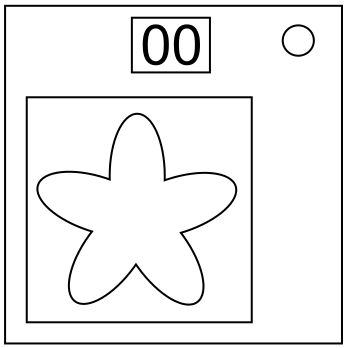
What IS Elation? ME! I am Elation! Hahahaha~
CAUTION: Any mistake will cause this module to strike repeatedly until detonation!
| Tens of minutes digit | Units of minutes digit | Tens of seconds digit | Units of seconds digit | |
|---|---|---|---|---|
| 0 | either digit | is divisible by | 0 | (or) 4 |
| 1 | units digit | is | (a) prime | (or) 5 |
| 2 | every digit | ends with | 1 or 7 | (or) 2 |
| 3 | neither digit | is less than | the units digit | (or) 8 |
| 4 | display | contains | 2 or 8 | (or) 1 |
| 5 | digits’ product | is not | the same | (or) 0 |
| 6 | tens digit | begins with | 4 or 6 | (or) 3 |
| 7 | digits’ abs. difference | does not contain | either digit | (or) 9 |
| 8 | digits’ sum | is greater than | the tens digit | (or) 7 |
| 9 | display read backwards | is 1 away from | a / exactly | (or) 6 |

As a scripter, I can say none of this makes sense.
Find out what using directives are unnecessary. The number indicates the unnecessary using directive.
Rules:
Exceptions:
|
Check both the variable type and name and cycle through all the different options (Int, Float, Bool and Char). Use only the first option you find in this list.
Check the action and the using directives, and look up the pair in the final table.
|
Using directives (Right) Serial Number (Below) |
Any using directive contains “KTaNE” | Else |
| Contains any letter in the word “KTaNE” | HandleSolve(); | HandleStrike(); |
| Else has a vowel | Solve(); | Strike(); |
| Else | OnSolve(); | OnStrike(); |
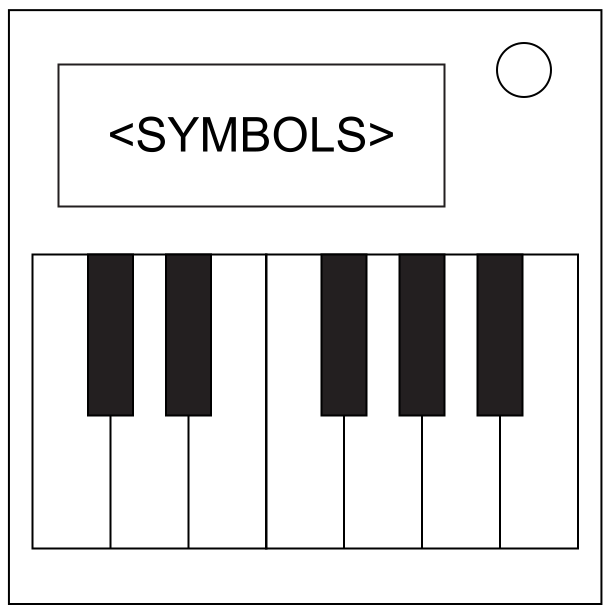
The devil’s interval approaches...
See Appendix A for indicator identification reference.
See Appendix B for battery identification reference.
See Appendix C for port identification reference.
See the third page for serialism & music terminology reference.
Table 1.
| # | Prime 12-tone Sequence | # | Prime 12-tone Sequence |
| 0 | F D F# G# C B A# C# G E D# A | 5 | C D# F# D F C# B A G A# E G# |
| 1 | A# A C E C# D D# G B F# G# F | 6 | G# C A# C# E G B D# A D F F# |
| 2 | F# B A G# D C G C# F D# E A# | 7 | E A C# B G G# A# D# F# F C D |
| 3 | E D# D F# F A# G# C# C B G A | 8 | G# D# D E A# C# F# G F A C B |
| 4 | D E A A# C B C# G# F F# D# G | 9 | D# G# C B D C# F# A# F G A E |
Table 2.
| Required Symbol(s) | Further Requirements | Lookup Index | Transformation |
 and T and T |
2 or more indicators (lit or unlit) | Left-most digit in serial number | RI |
# or  |
An empty port plate | Number of battery holders* | P, transpose down by ‘x’ semitones, where ‘x’ = number of minutes remaining |
U or  |
2 or more of a certain type of port | Least significant digit of number of completed modules | I |
B and  |
2 or more port plates | 9 minus the number of unlit indicators† | R |
| C or c | Serial contains 1 or more vowels | Least significant digit of number of strikes | R, transpose down by 3 semitones |
| n or m | Even number of batteries | DVI-D present: 7 Otherwise: 3 |
P, transpose up by ‘x’ semitones, where ‘x’ = number of ports‡ |
b or  |
An indicator with no vowels in the label | 8 | I |
| or |
Less than 2 ports‡ | 4 | R |
| or |
(No other requirements) | 5 | P |
If none of these rules apply, refer to the manual for Piano Keys and play the given note sequence according to its rules. |
|||
Notes:
*: If the number of battery holders exceeds 9, continually subtract 10 until you have a result in the 0 to 9 range (inclusive).
†: If the result is negative, continually add 10 until you have a result in the 0 to 9 range (inclusive).
‡: The Stereo RCA port does not count as 2 separate ports; the Red & White connectors are part of the same singular port.
To clarify, the note below a C would be a B, and similarly, the note after a B would be a C. The 12 tones on the piano essentially wrap around.
The Prime sequence (or ‘P’ for short), is the original or base form of the 12-tone row. No transformation takes place.
The Retrograde sequence (or ‘R’ for short), takes the Prime sequence, but executes it in reverse order. For example, the Retrograde of the Prime row A B C D E would be E D C B A.
The Inverse sequence (or ‘I’ for short), takes the Prime sequence, but the intervals between the notes are inverted. For example, take the interval from A to B; the interval is +2 semitones, as it takes you 2 semitones to get from A to B (A goes to A# then B). The inversion of this interval would be -2 semitones. Therefore, the inverted sequence would be A then G, as G is -2 semitones away from A (A goes to G# then G).
As an extended example, the Inversion of the Prime row A B C D E would be A G F# E D; the first note always remains the same, and all the other notes get inverted relative to that note.
The Retrograde Inverse sequence (or ‘RI’ for short), takes the Inverse sequence in Retrograde. For example, the Retrograde Inverse of the Prime row A B C D E would take the Inverse first (which is A G F# E D), and then the Retrograde of this Inverse would be D E F# G A.
Transpositions apply a translation of the tone row up or down by a given number of semitones. For example, the Prime row A B C D E transposed up by 1 semitone would be A# C C# D# F.
An Interval is the tonal distance between two distinct notes and is usually measured in semitones. For example, the interval from G to B is up 4 semitones.
Let’s all gather round for a family sing-a-long!
See Appendix A for indicator identification reference.
See Appendix B for battery identification reference.
See Appendix C for port identification reference.
| Required Symbol(s) | Further Requirements | Note Sequence |
|---|---|---|
| " | More even digits in the serial number than odd | Eb F Eb C Ab F Eb |
| % or x | Any duplicate characters or digits in serial number | C# B A F# G# A G# F# |
| m and * | (No other requirements) | G A G E G A G E |
| v or |
At most 2 types of port | Eb Eb Db Ab Eb Eb F Db |
| ^ | Lit indicator with vowel | B A G Eb D A B A G |
| or x |
3 or more AA batteries | F# G A A D B A G E D |
| w and |
(No other requirements) | G E F G C B C D C B A G |
| > or ^ or v | Serial number contains 1 or 9 | G G G G G G G Bb Eb F G |
| % or B or " | (No other requirements) | D D D C# C# C# B C# B F# |
| (No requirement) | (No other requirements) | Bb A Bb G (Play sequence x times, where x equals largest digit in serial + 1) |
What do you get when you drop a piano down a mine shaft? A flat minor.
See Appendix A for indicator identification reference.
See Appendix B for battery identification reference.
See Appendix C for port identification reference.
See the next page for piano/keyboard reference.
| Required Symbol(s) | Further Requirements | Note Sequence |
| b | Last digit of serial number is even | Bb Bb Bb Bb Gb Ab Bb Ab Bb |
| c or # | 2 or more battery holders | Eb Eb D D Eb Eb D Eb Eb D D Eb |
| n and U | (No other requirements) | E F# F# F# F# E E E |
| C or T | RCA port is present | Bb A Bb F Eb Bb A Bb F Eb |
| B | SND indicator is present and lit | E E E C E G G |
| m or U or c | 3 or more batteries | C# D E F C# D E F Bb A |
| b and # | (No other requirements) | G G C G G C G C |
| C or m | Serial number contains a 3, 7 or 8 | A E F G F E D D F A |
| n or T or B | (No other requirements) | G G G Eb Bb G Eb Bb G |
| (No requirement) | (No other requirements) | B D A G A B D A |
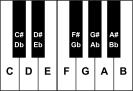
Use the following graphic as a reference to how tones are mapped onto a standard 12-note piano/keyboard.
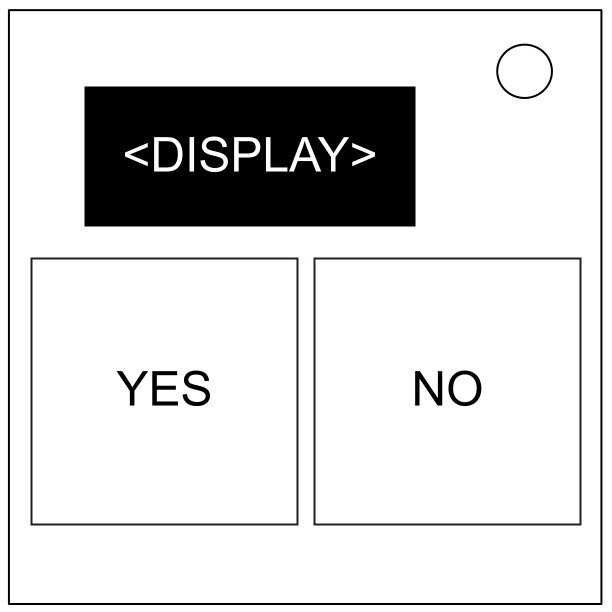
It’s easy to identify colors. Red, Blue, Green, etc. Turns out it’s a bit harder when you display a word color in a different color though...
|
The color of the last word in the sequence is Red:
If Green is used as the word at least three times in the sequence, press Yes on the third time Green is used as either the word or the color of the word in the sequence.
Otherwise, if Blue is used as the color of the word exactly once, press No when the word Magenta is shown.
Otherwise, press Yes the last time White is either the word or the color of the word in the sequence.
|
|
The color of the last word in the sequence is Yellow:
If the word Blue is shown in Green color, press Yes on the first time Green is used as the color of the word.
Otherwise, if the word White is shown in either White or Red color, press Yes on the second time in the sequence where the color of the word does not match the word itself.
Otherwise, count the number of times Magenta is used as either the word or the color of the word in the sequence (the word Magenta in Magenta color only counts as one), and press No on the color in the total’s position (e.g. a total of 4 means the fourth color in sequence).
|
Continuation of previous table...
|
The color of the last word in the sequence is Green:
If a word occurs consecutively with different colors, press No on the fifth entry in the sequence.
If Magenta is used as the word at least three times in the sequence, press No on the first time Yellow is used as either the word or the color of the word in the sequence.
Otherwise, press Yes on any color where the color of the word matches the word itself.
|
|
The color of the last word in the sequence is Blue:
If the color of the word does not match the word itself three times or more in the sequence, press Yes on the first time in the sequence where the color of the word does not match the word itself.
If the word Red is shown in Yellow color, or the word Yellow is shown in White color, press No when the word White is shown in Red color.
Otherwise, press Yes the last time Green is either the word or the color of the word in the sequence.
|
|
The color of the last word in the sequence is Magenta:
If a color occurs consecutively with different words, press Yes on the third entry in the sequence.
If the number of times the word Yellow appears is greater than the number of times that the color of the word is Blue, press No the last time the word Yellow is in the sequence.
Otherwise, press No on the first time in the sequence where the color of the word matches the word of the seventh entry in the sequence.
|
|
The color of the last word in the sequence is White:
If the color of the third word matches the word of the fourth word or fifth word, press No the first time that Blue is used as the word or the color of the word in the sequence.
If the word Yellow is shown in Red color, press Yes on the last time Blue is used as the color of the word.
Otherwise, press No.
|
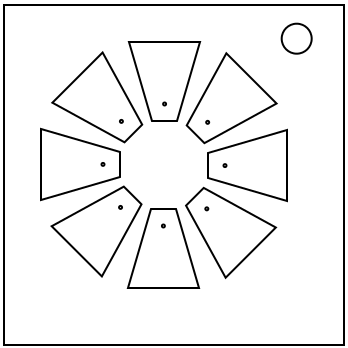
I think someone tried to make this module look really cool, but failed.
|
|
|
|
|
|
|
|||||
|
|
|
|
|
|
|
|||||
|
|
|
|
|
|
|
|||||
|
|
|
|
|
|
|
|||||
|
|
|
|
|
|
|
|||||
|
|
|
|
|
|
|
|||||
|
|
|
|
|
|
|
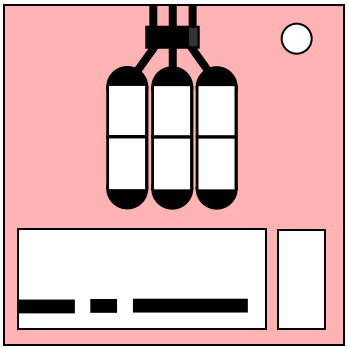
Get it? Because it uses Morse and maths! I’ll see myself out...
Transmitted Morse is interpreted based on gaps between button holds.
Holding for more than double the length of the average gap is considered to be a dash, and anything shorter is considered a dot.
When transmitting, E and T are considered equal, as they are indistinguishable.
Take the 4th and 5th character of the serial number, this is your character pair.
Perform each step below in sequence, modifying your character pair progressively:
| How to Interpret |
|---|
|
1. A short flash represents a dot. 2. A long flash represents a dash. 3. There is a long gap between letters. 4. There is a very long gap before the word repeats. |
|
| A | 1 | N | 14 | |
| B | 2 | O | 15 | |
| C | 3 | P | 16 | |
| D | 4 | Q | 17 | |
| E | 5 | R | 18 | |
| F | 6 | S | 19 | |
| G | 7 | T | 20 | |
| H | 8 | U | 21 | |
| I | 9 | V | 22 | |
| J | 10 | W | 23 | |
| K | 11 | X | 24 | |
| L | 12 | Y | 25 | |
| M | 13 | Z | 26 |
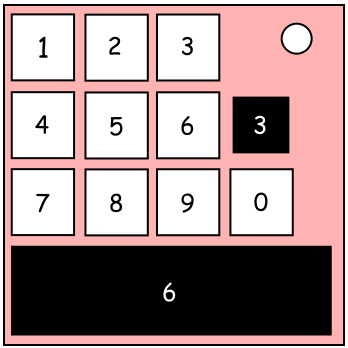
This one likes attention, but not too much attention.
First number:
|
Second number:
|
All other numbers:
|
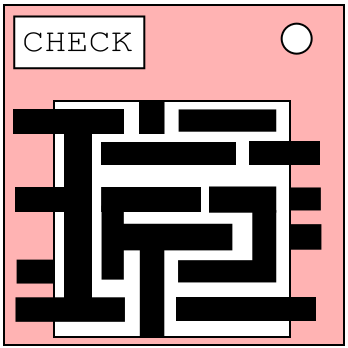
I’d wash your hands after this one...
Red Input
|
Yellow Input
|
Green Input
|
Blue Input
|
Red Output
|
Yellow Output
|
Green Output
|
Blue Output
|
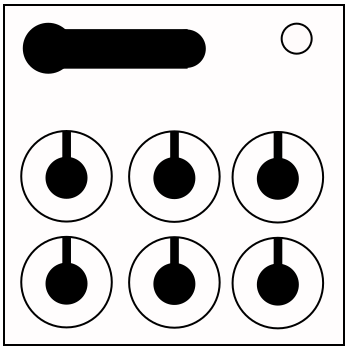
This safe either contains immense riches, or is empty.
| Dial | ||||||
| Top | Bottom | |||||
| Left | Middle | Right | Left | Middle | Right | |
| Serial | ||||||
| First | Second | Third | Fourth | Fifth | All | |
| A | 8 | 3 | 4 | 8 | 9 | 0 |
| B | 10 | 1 | 3 | 7 | 3 | 8 |
| C | 2 | 1 | 1 | 5 | 3 | 6 |
| D | 11 | 6 | 11 | 11 | 7 | 7 |
| E | 0 | 5 | 5 | 8 | 2 | 1 |
| F | 4 | 2 | 7 | 7 | 1 | 5 |
| G | 7 | 4 | 4 | 2 | 10 | 5 |
| H | 8 | 3 | 6 | 6 | 6 | 5 |
| I | 0 | 11 | 0 | 0 | 9 | 10 |
| J | 2 | 11 | 8 | 0 | 5 | 6 |
| K | 5 | 2 | 5 | 1 | 0 | 4 |
| L | 1 | 9 | 8 | 11 | 11 | 11 |
| M | 1 | 7 | 9 | 5 | 6 | 2 |
| N | 9 | 5 | 1 | 4 | 4 | 9 |
| O | 5 | 9 | 8 | 10 | 2 | 8 |
| P | 3 | 10 | 9 | 1 | 9 | 7 |
| Q | 4 | 10 | 6 | 1 | 4 | 8 |
| R | 8 | 0 | 4 | 0 | 6 | 11 |
| S | 9 | 4 | 0 | 6 | 3 | 10 |
| T | 7 | 6 | 7 | 11 | 5 | 3 |
| U | 11 | 9 | 6 | 3 | 11 | 1 |
| V | 11 | 11 | 2 | 8 | 1 | 0 |
| W | 6 | 0 | 11 | 6 | 11 | 2 |
| X | 4 | 2 | 7 | 2 | 8 | 10 |
| Y | 10 | 7 | 10 | 10 | 8 | 9 |
| Z | 3 | 7 | 1 | 10 | 0 | 4 |
| 0 | 7 | 0 | 3 | 5 | 8 | 6 |
| 1 | 9 | 10 | 10 | 9 | 1 | 2 |
| 2 | 2 | 5 | 11 | 7 | 7 | 3 |
| 3 | 10 | 8 | 10 | 4 | 10 | 4 |
| 4 | 6 | 8 | 0 | 3 | 5 | 0 |
| 5 | 6 | 3 | 3 | 3 | 0 | 11 |
| 6 | 1 | 1 | 5 | 2 | 7 | 3 |
| 7 | 0 | 6 | 2 | 4 | 2 | 1 |
| 8 | 5 | 4 | 9 | 9 | 10 | 7 |
| 9 | 3 | 8 | 2 | 9 | 4 | 9 |
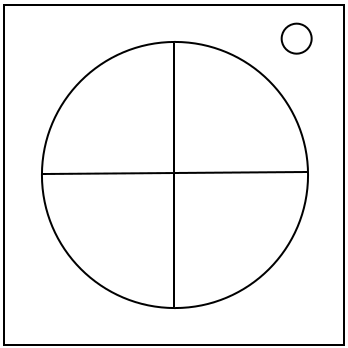
I’m not sure this even qualifies as Simon Says...
| Priority | Top-Left Button Colour | |||
| ■ Red | ▲ Yellow | ● Green | ★ Blue | |
| Highest | ■ Red | ★ Blue | ● Green | ▲ Yellow |
| High | ★ Blue | ▲ Yellow | ■ Red | ● Green |
| Low | ● Green | ■ Red | ▲ Yellow | ★ Blue |
| Lowest | ▲ Yellow | ● Green | ★ Blue | ■ Red |
Stage 1
|
Stage 2
|
Stage 3
|
Stage 4
|
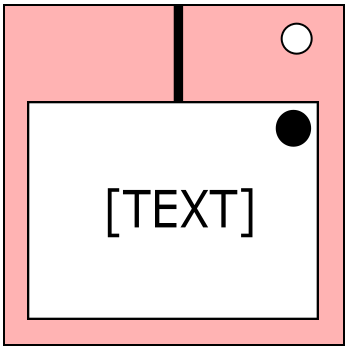
This may look like the button you know and love, but don’t be fooled! It’s a brilliantly disguised imposter foiled only by a single mistake: It’s the wrong shape.
Follow these rules in the order they are listed. Perform the first action that applies: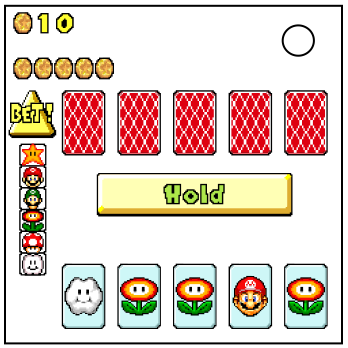
Well, it’s actually called Picture Poker, but who uses that name? The primary things about this minigame are Luigi and Poker. Thus, Luigi Poker. I guess Nintendo had to get the name to be alliterative, though.
Presented is a felt table with several buttons and two hands of five cards (the hand sitting face up is yours; the one face down is Luigi’s). You start with 10 coins, and your goal is to increase your balance to 100 coins, by gambling. If your balance is 0 or less at the start of a new round, it defaults to 10 coins.
There are six different cards in Luigi Poker: Cloud, Mushroom, Fire Flower, Luigi, Mario and Star. In tie breaks, Cloud is worth the least and Star is worth the most. This priority list is on the module and in Appendix L1F3 54V1NG5.
Also in Appendix L1F3 54V1NG5 is a list of possible hands (best to worst) and the reward for winning a round with each. This list is not on the module.
Select cards from your hand that you want to get rid of, then press “Draw”, or “Hold” if you have none selected. Pressing “Draw” will give the selected cards back to Luigi, who will then deal you new cards, until you have a hand of five again. Afterwards, Luigi will do the same with his own hand.
Once Luigi has finished his turn, your hands will be revealed: whoever has the best hand wins.
Ties are broken like so:
If you would like to, you may increase your bet from one coin to a maximum of five, by pressing the button labelled “BET!”, before pressing “Draw” or “Hold”.
Pressing the status light will toggle “solve hold mode”; if this mode is enabled when the module would normally solve, it will wait until you press the status light again, before solving.
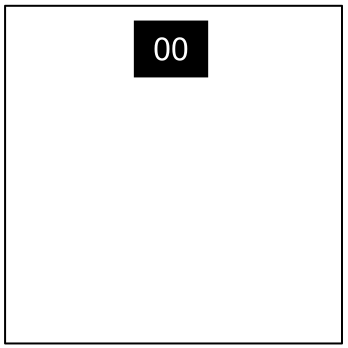
Needy modules cannot be disarmed, but pose a recurrent hazard.
Needy modules can be identified as a module with a small 2 ‑digit timer in the top center. Interacting with the bomb may cause them to become activated. Once activated, these needy modules must be tended to regularly before their timer expires in order to prevent a strike.
Stay observant: needy modules may reactivate at any time.
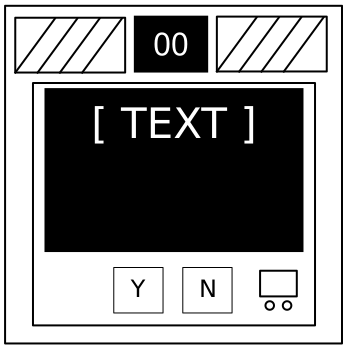
Computer hacking is hard work! Well, it usually is. This job could probably be performed by a simple drinking bird pressing the same key over and over again.
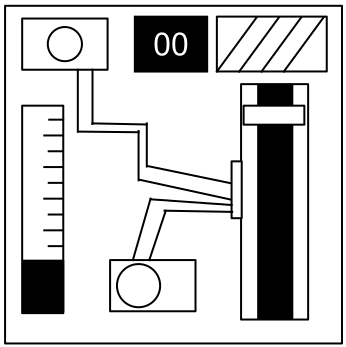
I'm going to guess that this is just meant to occupy your attention, because otherwise this is some shoddy electronics work.
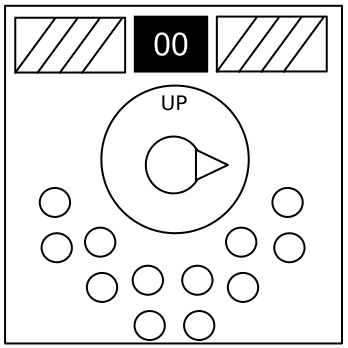
Needlessly complicated and endlessly needy. Imagine if such expertise were used to make something other than diabolical puzzles.
| X | X | X | |||
| X | X | X | X | X |
| X | X | X | |||
| X | X | X | X |
| X | X | X | |||
| X | X | X | X | X |
| X | X | X | |||
| X | X |
| X | |||||
| X | X | X | X |
| X | |||||
| X | X |
| X | X | X | X | X | |
| X | X | X | X |
| X | X | X | |||
| X | X | X | X |
X = Lit LED
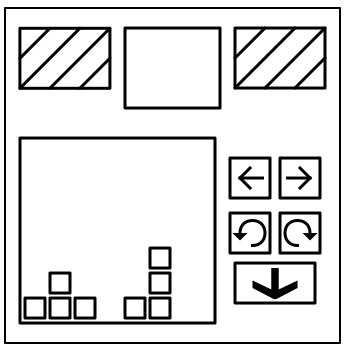
Chances are you’ve already played many iterations of this game. At this point, how can we be sure that Tetris isn’t some kind of meta-virus that propagates itself through game developers and modders?
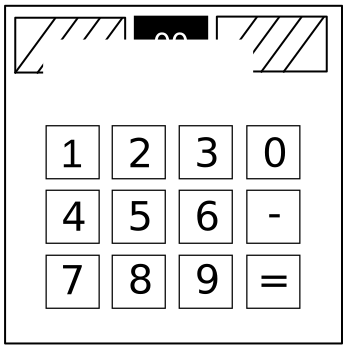
Math is still easy. But is it easy when you have to answer questions over and over to stop an explosion? Only one way to find out.
Answer the question. Enter the answer with the keypad and press '=' to submit your answer. Use '-' to toggle the sign. Don't blow up!
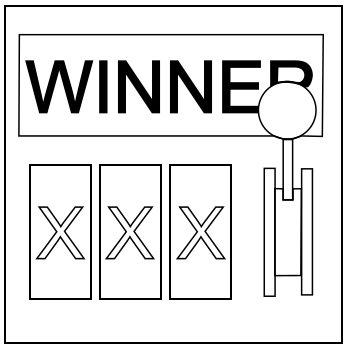
Huh. You’d think a bomb would stop a gambling addiction, but I guess not.
While the WINNER sign has flashing lights:
If the WINNER sign has alternating flashing lights:
| Valid Slots | |||
|---|---|---|---|
| No Strikes | L L L | L T B | T B B |
| 1 Strike | L L T | L B X | T T B |
| 2+ Strikes | L L L | T T X | T B X |
If the WINNER sign flashes all together:
| Valid Slots | |||
|---|---|---|---|
| No Strikes | L X X | L T B | T T T |
| 1 Strike | L L L | L T X | B B X |
| 2+ Strikes | T B X | B B X | B B B |
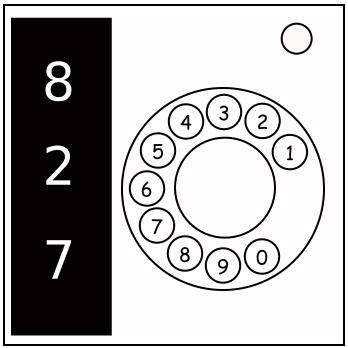
Hello, this is emergency services, please hold...
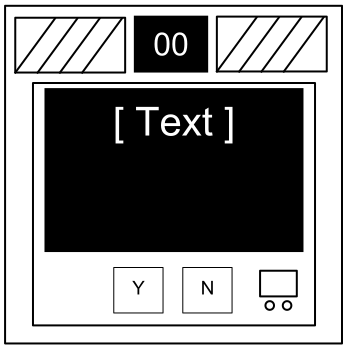
I hope you studied, it’s quiz night!

Halt your movements! Wait, wrong guy. Then again A-90 your movements doesn’t actually make sense.
Labelled indicator lights can be found on the sides of the bomb casing.
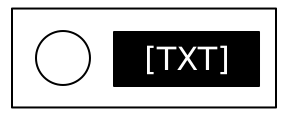
Common battery types can be found within enclosures on the sides of the bomb casing.
| Battery | Type |
|---|---|
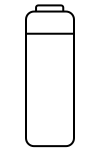
|
AA |
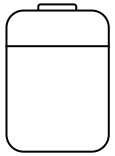
|
D |
Digital and analog ports can be found on sides of the bomb casing.
| Port | Name |
|---|---|
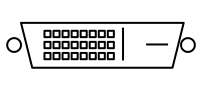
|
DVI-D |
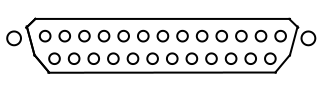
|
Parallel |

|
PS/2 |

|
RJ-45 |
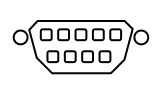
|
Serial |
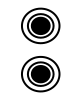
|
Stereo RCA |


